Release archive description
The release archive comes as a compressed zip file. Inside, you will find everything needed to use the engine.
The archive contains different folders :
- Bin : Contains Dlls, and the executable for the Nilkins Editor
- Data : Contains all resources provided with the release, for instance tutorial or sample data
- Dev : Contains the .lib files along with the pdbs
- Documentation : Contains all the documentation for an offline access (API, tutorials)
- Includes : Contains the header file
- Info : Information about the release archive used, like the version and the copyright texts
Compatibility
Currently, the library is only compatible with Windows 10 x64. Release is compiled using the latest Visual Studio 2019, with the latest Windows SDK provided.
Setting up a project to use the engine
Visual Studio 2019
Prerequisites
To develop with the engine you will need :
- Visual Studio 2019, with :
- The C++ development tools
- Latest Windows SDK
If you already installed VS2019, you can check this information by launching the Visual Studio Installer and modifying the VS2019 installation. Else, you will have access to it right during the installation. Ensure that :
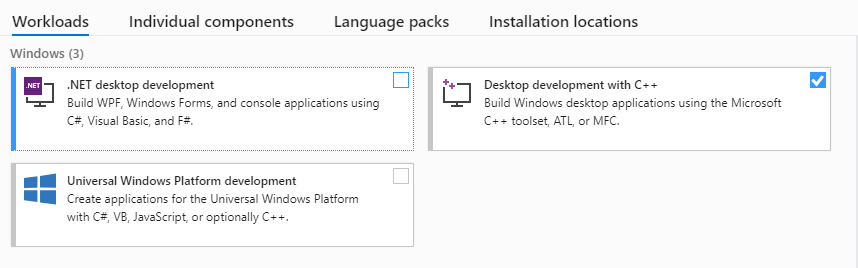

With this you should be ready to go and proceed with the project setup.
Preparing a new project
Note that all tutorials provided will assume a setup looking like the one described. This will impact include folders demonstrated, for instance.
From the release folder, take these steps to setup a project within Visual Studio :
- Setup your project to use C++17, currently required for usage of std::string_view (Project properties > General > C++ Language Standard > C++17)
- Add the Bin folder to the PATH within the Debugging environment (Project properties > Debugging > Environment > "%PATH%=%PATH%;FolderPath")
- Add the Include folder path to the additional include folders (Project properties > C/C++ > General > Additional Include Directories)
- Add the Dev folder to the additional library folders (Project properties > Linker > Additional Library Directories)
The project should now be able to fetch all information required to use the components provided.
Don't forget that the library is 64 bits, meaning that you will need to compile your project in its x64 configuration too.
For any component used in code, don't forget to add the input .lib concerned to your settings (Project Properties > Linker > Input).
Its .dll file will have to be set next to your executable, as a result.
Example project
Let's launch VS2019, and create a new project. We create it in a folder next to the release folder :
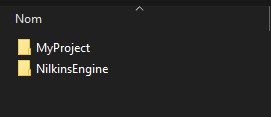
Within the NilkinsRelease folder, we have the release archive unzipped. MyProject is the folder where we created the project and solution.
Let's set the project up. Once opened in VS, we right click on the project in the solution explorer window, open the properties, and prepare it like this, following the check list above :
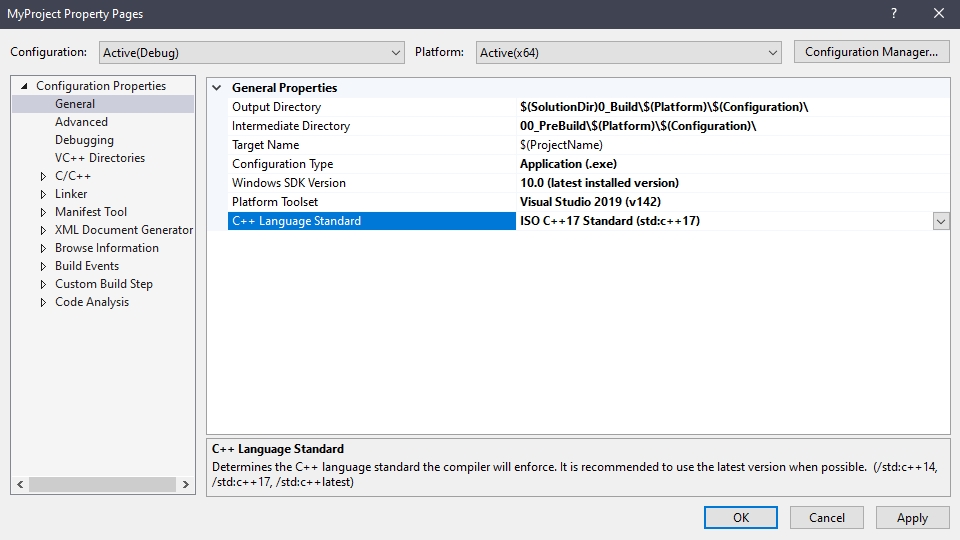
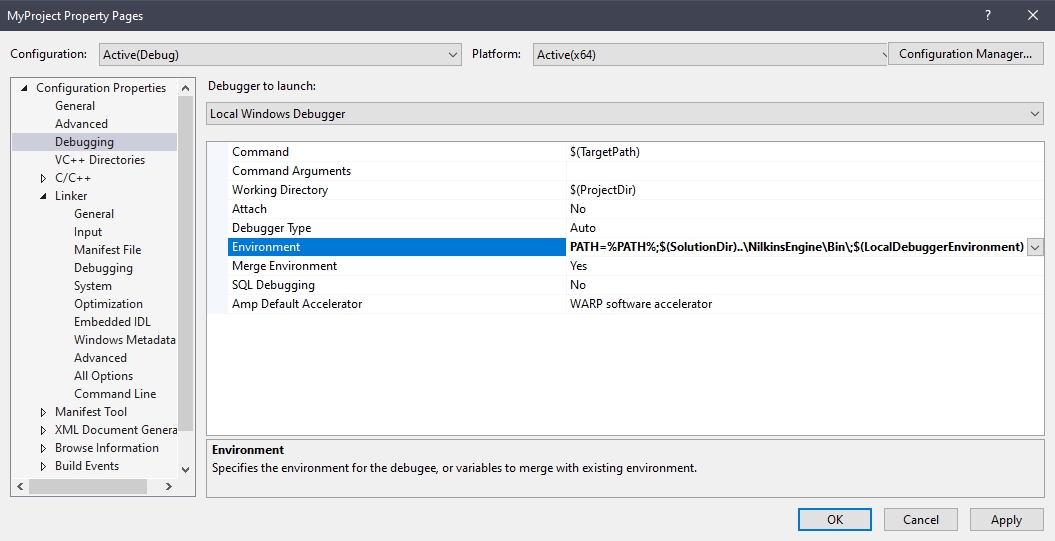
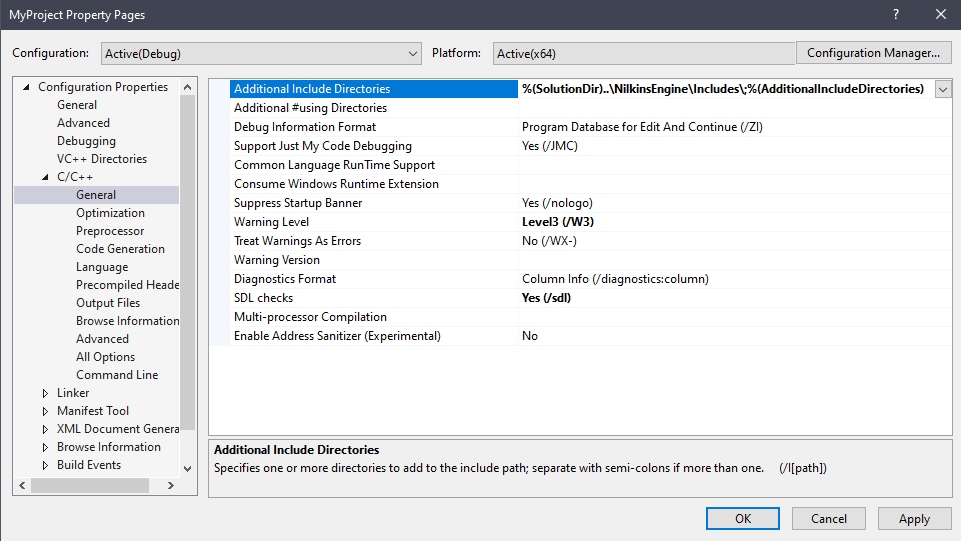
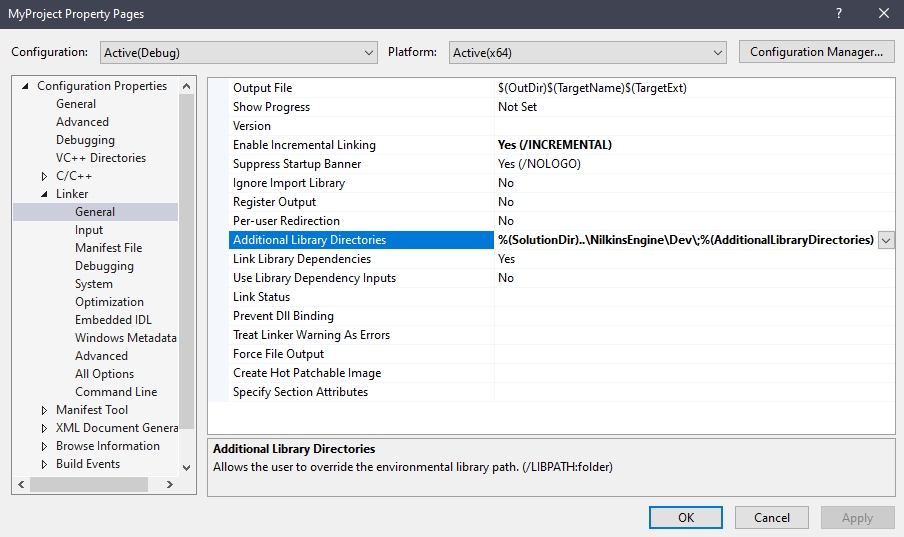
Now, let's we write a quick program in main.cpp, to do a sanity check :
//////////////////////////////////////////////
// main.cpp
//
//////////////////////////////////////////////

/// Includes ---------------------------------

// Standards
#include <NilkinsGraphics/Systems/MainSystem.h>

/// Function ---------------------------------

int main ()
{
    nkGraphics::MainSystem* system = nkGraphics::MainSystem::getInstance() ;
    return 0 ;
}
As it's using the nkGraphics component, we also need it as a .lib included :
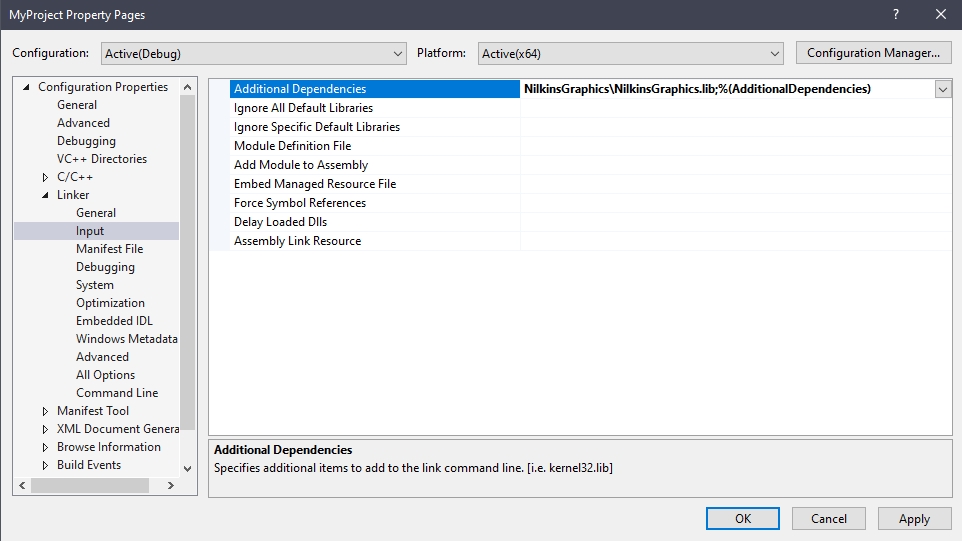
We should be able to launch it as a result. This tests the includes, the linking, and the dll searching. Depending on what arises :
- Cannot find include file -> Check the include folder given
- Error while linking -> The linking folder / input is incorrect or badly formed
- Dll required to run -> The PATH specified in the debugging section has to be checked
Once this is properly set up and works from A to B, we are ready to work with the engine !